How to Design a Room on iPhone, Step by Step
You have a room that needs to change, a phone full of saved pictures, and no idea how to get from those to furniture that actually fits. Designing a room is less about taste than about order: get the measurements and the plan right, and the look has somewhere to go.
 Scooch is an iPhone and iPad appPoint your iPhone camera at the code to install it.
or text me the link
Can you design a room on your iPhone?
Yes. You can design a room from your phone, and you can start with the apps it already has. Work in this order: write down what the room is for, measure it, draw it to scale, place the furniture at its real sizes, and only then choose colours, materials and light. Doing it in that order matters because each step limits the next. A colour scheme cannot rescue a sofa that blocks the door.
The built-in apps cover part of this. The Measure app measures dimensions and keeps a list of the measurements you take, Notes holds photos and drawings, and Photos holds your saved ideas. What they do not give you is a plan drawn to scale where you can move a sofa and see whether it still fits. For that you need squared paper or a planner app. Scooch is one: a 2D room and floor planner for iPhone and iPad where you type the room's size and drag furniture around at its real dimensions (see the last section).
AI tools can help with ideas, but a generated picture of a room is not a measured drawing of yours. Use them for the style, and check every size against your plan (see Step 6).
Step 1: Write a one-page brief
Before you measure anything, open a new note and answer four questions. Designers call this a brief, and it is the part people skip.
- What does the room have to do? Sleep, watch films, work, host six people for dinner. Two jobs means two zones.
- Who uses it? A child, a dog, someone who works from home, a guest twice a year.
- What stays? List the pieces you keep, with their sizes. They are fixed points, just like the walls.
- What is the budget? Write a number. It decides whether you are buying one new sofa or redoing the whole room.
Add photos of the room as it is now to the same note, from each corner. When you are standing in a shop later, that note answers most of your questions.
Step 2: Measure the room
Measure every wall at floor level, then mark where each door, window and radiator starts and ends, measured from a corner. Note which way each door swings, the ceiling height, and where the sockets and switches are. How to measure a room for furniture walks through it in order, including the things people forget.
On iPhone, the built-in Measure app can measure dimensions and save the measurements you take, and it has a level for checking whether a shelf or a picture hangs straight. For long walls, a tape measure or a laser measure is still the tool to trust: a few centimetres decide whether a wardrobe fits a gap.
Step 3: Draw it to scale
A sketch with numbers on it is a list. A drawing to scale shows you where things go, because a 90 cm gap looks like 90 cm. On squared paper, pick a scale where one square is 10 cm, and the room, the doors and every piece of furniture are drawn at the same scale. Draw each door's swing as a quarter circle: that floor is taken.
Paper works, but every new idea means drawing the room again. This is the step where an app saves the most time, because you draw the room once and move the furniture as often as you like.
Step 4: Lay out the furniture
Place the pieces in this order: the one big piece the room is arranged around (the bed, the sofa, the dining table), then what relates to it, then whatever needs a wall. Before any of it, keep the walking paths clear. Homes have no single rule for path width, but there is a measured benchmark: the US 2010 ADA Standards for Accessible Design set the clear width of a walking surface at 36 inches (915 mm) minimum. Those standards cover public buildings, not your flat, but a path that wide is a sound target for the routes you use every day.
How to lay out furniture in a room goes through the order step by step, and the small living room layout guide has arrangements that work when space is tight. For the gaps between pieces, see how much space between a sofa, coffee table and TV.
Step 5: Use real sizes, not remembered ones
The plan is only as good as the numbers in it. Two sofas with the same number of seats can differ a lot in width and depth, so take every size from the listing of the piece you are considering, not from what a sofa usually is. Standard sofa dimensions and bed sizes and the space around a bed give typical ranges to shortlist with.
Check the things that open too. A wardrobe needs its doors' full swing plus room to stand in front of it, drawers need their own depth pulled out, and a sofa bed opened out reaches well past the sofa. And check the route in: a sofa that fits the room still has to get through the front door, which the sofa fit calculator checks.
Step 6: Where AI helps, and where it does not
Searches for designing a room with AI are about two different tools, and they help with different steps.
- An AI chat assistant can help with the brief (Step 1): ask it to suggest layouts for a room with your exact width, depth, door and window positions, or a colour scheme that works with the floor you have. Give it your numbers, because it does not know them. Then draw its suggestion on your plan and check it, the same as any other idea.
- An AI image generator can show a mood: a style, a colour combination, a kind of lighting. The picture it makes is not drawn from your measurements, so treat the furniture in it as an illustration, not a size.
A useful rule: AI for what the room should feel like, the plan for what physically fits.
Step 7: Choose the look last
With the layout settled, the look has edges to work within. Three things keep it on track:
- Collect, then cut. Save ideas into one album in Photos, then delete everything that does not fit the brief from Step 1. What is left is your style.
- Pick the big colours first. The floor, the walls and the largest piece of furniture cover the most area. Smaller things like cushions and art are easy to change later.
- Try paint and fabric in the room. Put a sample on the wall it is meant for and look at it in the morning and in the evening, under the lights you actually have.
Step 8: Anchor what is tall
A new design usually means a bookcase, dresser or TV in a new spot. The US Consumer Product Safety Commission reports that 17,800 people a year are injured in TV and furniture tip-over incidents, and that 47 percent of the 217 tip-over deaths it recorded from 2013 through July 2023 involved a television. Its advice: anchor TVs, bookcases and dressers securely to the wall, put a TV that cannot be anchored on a sturdy, low base pushed as far back as possible, and keep heavier items on lower shelves. When you choose a wall for a tall piece, check that you can fix it there.
Which tool covers which step
| Step | Built-in iPhone apps | Scooch |
|---|---|---|
| The brief | Notes, Photos | No |
| Measuring | Measure, plus a tape | You type the sizes |
| Plan to scale | No | Yes |
| Furniture layout | No | Yes |
| Colours and materials | Photos | No |
Plan the room in Scooch
Scooch covers Steps 3 to 5. It runs on iPhone and iPad with iOS 26 or later, which includes the current iOS 27.
- Draw the room. Type its width and depth, and the drawing stays exact. Join a second room to it if your space is an L or a U, and switch between metric and imperial in Settings.
- Add doors, windows and arches. Slide them along the walls. A door draws its swing, and a piece of furniture standing in that swing is flagged.
- Add furniture. Pick from the catalogue by room (living room, bedroom, office, dining, kitchen, bathroom) and type the width and depth from the listing. If a piece is not in the catalogue, draw your own from rectangles, ellipses, triangles and lines.
- Move it until nothing clashes. A piece that overlaps another or pokes out of the room is shaded in a warning colour. A chair pushed under a table does not count as a clash.
- Show what opens. Wardrobe doors, drawers and a sofa bed can show the floor they need when open.
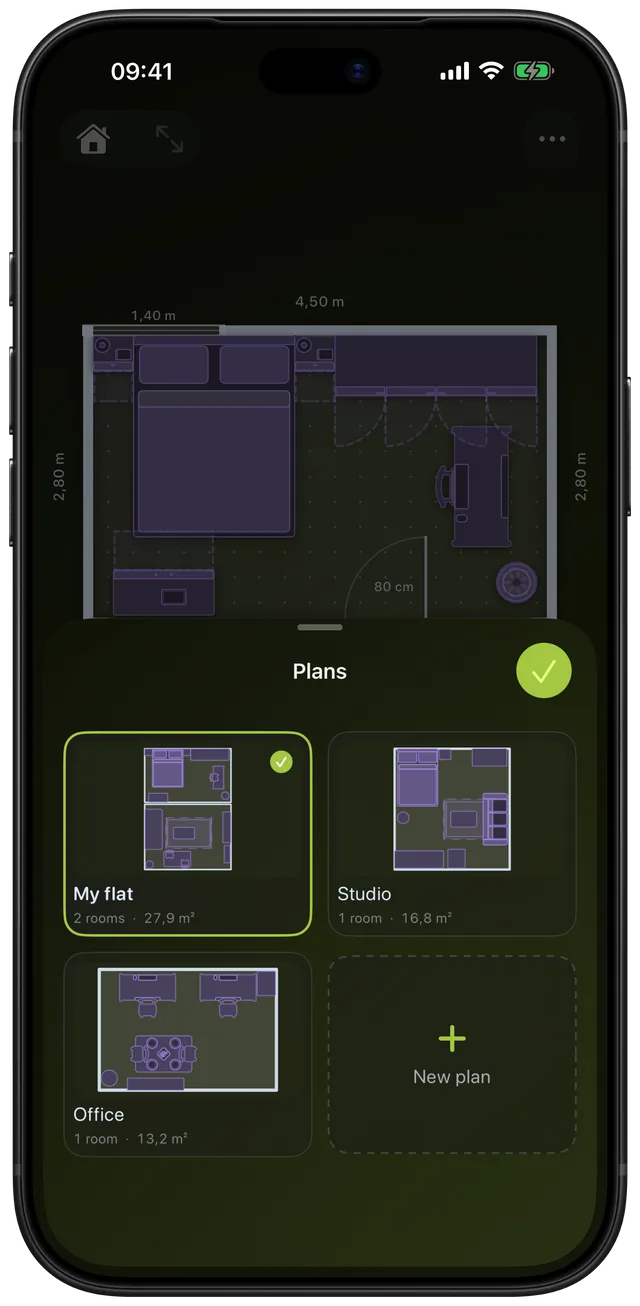
- Compare two designs. In the plan list, touch and hold a plan and tap Duplicate, then rearrange the copy.
- Share it. Export the plan as a PDF or PNG from Settings, for the person helping you move or the shop.
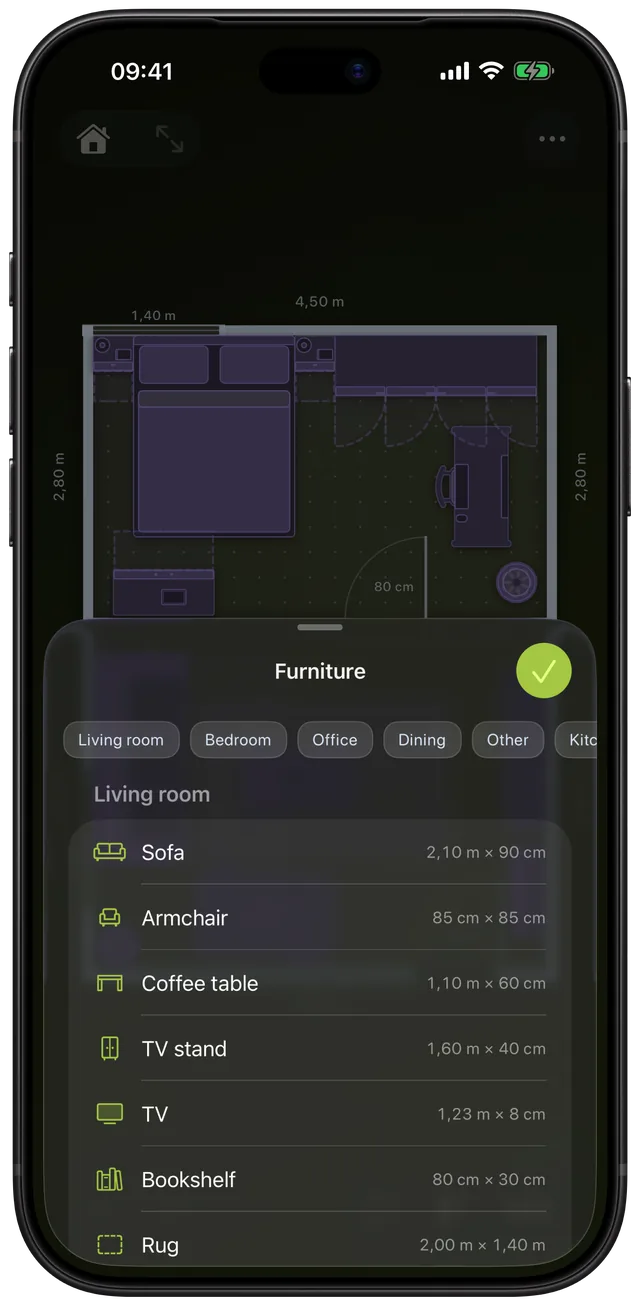
What it does not do: Scooch is a top-down 2D plan, with no 3D view, no paint colours or materials, no room scanning and no AI suggestions. It flags clashes and blocked doors, but it does not measure your walking paths, so check those against Step 4 by looking at the gaps.
Frequently asked questions
Can you design a room on your iPhone?
Yes. Use Notes and Photos for the brief and your ideas, the Measure app and a tape for the measurements, and a planner app or squared paper for the plan to scale. The built-in apps do not draw a scale plan you can move furniture around in, which is where a room planner app like Scooch comes in.
How do you design a room step by step?
Write a short brief (what the room is for, who uses it, what stays, the budget), measure it, draw it to scale, place the biggest piece of furniture first with the walking paths kept clear, then add the rest at their real sizes. Choose colours, materials and lighting last, once the layout works.
How do you design a room with AI?
Use an AI chat assistant for ideas: give it your room's width, depth and door and window positions, and ask for layouts or colour schemes. Use an image generator to explore a style. Then draw the ideas on a plan of your real room, because a generated picture is not drawn from your measurements.
Can I design a room online for free?
You can do most of the work for free with what your iPhone already has: Notes for the brief, Photos for ideas and the Measure app for measuring, plus squared paper for the plan. An app mainly saves time at the layout step, because you can move furniture without redrawing the room.
Do I need a phone with LiDAR to plan a room?
Only for apps that scan the room with the camera, which rely on the LiDAR Scanner. If you measure with a tape and type the sizes in, as you do in Scooch, any iPhone that runs the app works.